 Dino Kids

A child who drew all day at six is now eleven. She rubs out the same arm four times, screws up the page and says the thing parents dread: "I'm rubbish at drawing." A few years ago anything on paper was fine. Now she wants the bike to look like a bike, and it doesn't.
If you recognise this, your child hasn't lost a talent. They've reached the point where they want results that need techniques nobody has shown them yet. Drawing for tweens and teens is mostly a question of teaching those techniques in a sensible order: 3D shapes first, then shading, then perspective, and people last. The second half of this article shows how Advanced drawing in Dino Kids follows that order, lesson by lesson.
Why 10 to 14 year olds give up on drawing
Researchers noticed this pattern long ago. Jessica Davis (1997) describes a U-shaped curve: young children's drawing is lively and expressive, then in middle childhood, around 8 to 11, it gives way to failed attempts at realism or stock formulas, and at that stage most people stop altogether.
Part of the reason is that drawing what you see in three dimensions is hard, and takes longer than parents expect. In Aaro Toomela's study of 757 children, the share who could draw a cube with real depth was 8% at age 10, 27% at 11, 42% at 12 and 55% at 13. Among adults it was 75%. For a doll, the numbers barely moved: 3% at 13 and 8% among adults. So a ten-year-old who can't draw a convincing box is in the large majority.
Perspective is similar. Lee and Bremner (1987) studied children's drawings of a table and found that most older children appeared to use perspective, without using it correctly. They've sensed that things shrink and lines tilt, and they need someone to show them how.
And the hard part isn't the hand. Cohen and Bennett (1997) tested where adults' drawing errors come from, and their results point to misperceiving the object as the major source, with motor control a very minimal one. Learning to draw at this age is largely learning to look. That's good news for a tween who thinks they were born without the gift.
What school art covers and what it leaves to you
The curriculum documents leave a lot of room. England's National Curriculum for art and design asks Key Stage 2 pupils to keep sketchbooks and improve their mastery of techniques including drawing, and Key Stage 3 pupils to record observations and grow more proficient, but tone and perspective aren't named. The US National Core Arts Standards are built around processes such as persistence in developing skills, and the Visual Arts grid doesn't mention shading or perspective at all.
Other documents are more specific. The Department for Education's GCSE content in England lists tone and form among the formal elements. Ontario's curriculum, as summarised by its art teachers' association, moves through shading and cast shadows, then one-point perspective, then two-point perspective, and on to adult figures at seven to eight heads tall.
So a keen child might get a lot of this from a good art teacher, or very little. If they want more, it's worth knowing the order.
The order that works: 3D shapes, shading, perspective, people
Each step depends on the one before it. Shading a box you can't construct is wasted effort, and a figure is much easier once you can think of it as simple solids.
How to draw 3D shapes: start with a box
Begin with a real cardboard box on the table. Draw the face nearest you, then the back face shifted up and to one side, then join the corners. Sketch lightly and press harder only when the lines look right. Those faint first marks are called construction lines, and professionals use them too.
Move to a mug or a tin. The round top of a cylinder is an ellipse, and it gets flatter as it comes closer to eye level. Hold a cup at arm's length and raise and lower it to see this happen.
How to teach shading: one lamp, three tones
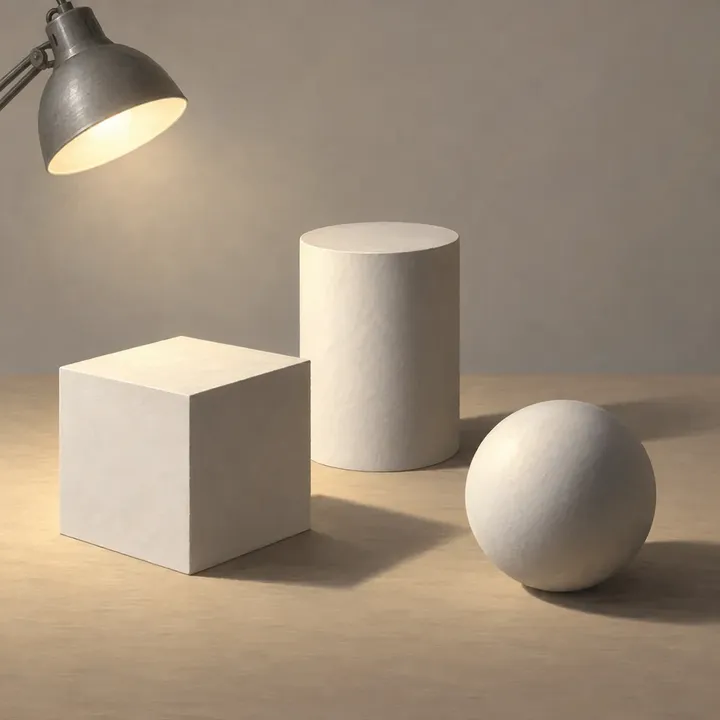
Put a white box on a table in a dim room with one desk lamp. Ask, "Which face is lightest? Which is darkest?" A box gives you three flat tones and sharp edges between them, which makes it the easiest place to start. Then look for the shadow on the table: it falls away from the lamp and is darkest where the box touches the surface.
Then try something round. On a ball or an orange the tone slides gradually, there's one brightest spot, and the dark edge glows slightly because the table bounces light back. Squinting helps a child see big areas of light and dark instead of details.
One point perspective before two point
Start with a photo of a straight road, a railway line or a school corridor. Lay a ruler along the edges and watch them meet at a single point on the horizon, which sits at eye level. That's one point perspective. Two point perspective comes after that, when you look at a building or box from the corner: the two sides run to two different points on the same horizon, and upright edges stay upright. Keep a ruler out here.
People last
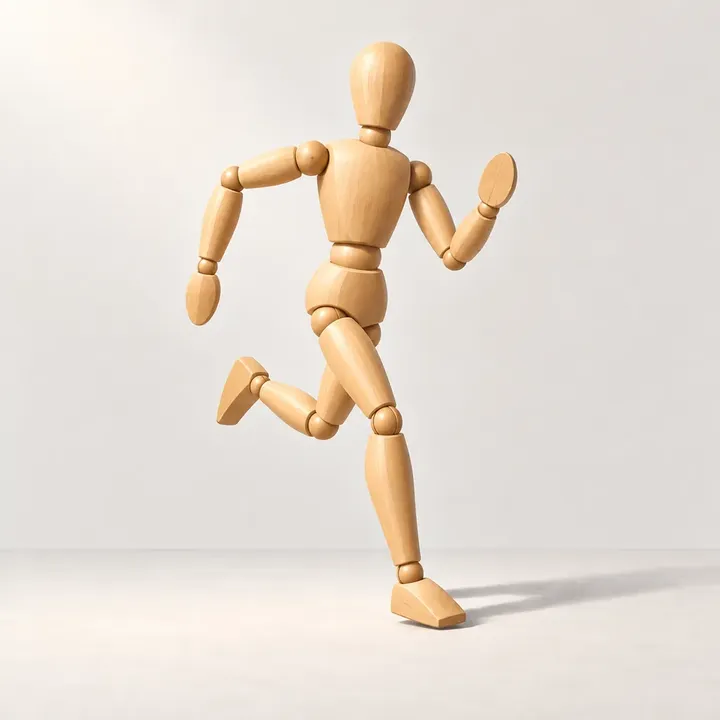
People are the hardest subject, as Toomela's figures show, so they come after the rest. Start with one quick curved line for the whole pose, then a stick figure with joints at the shoulders, hips and knees, then solid shapes for the head, chest and hips. A wooden artist's manikin is cheap and patient.
The head makes a handy ruler. An adult is about seven and a half heads tall and children are fewer heads tall, though real bodies vary, and a child should hear that clearly at an age when they're comparing themselves to everyone else.
How to help when they say "I can't draw"
You don't need to draw well to be useful here.
- Ask about what they see, not what they've drawn. "Is the top of the mug rounder or flatter than yours?" sends them back to looking, which is where the improvement is.
- Don't fix it. Taking the pencil sends a clear message. Point at the object instead.
- Keep a cheap sketchbook and date the pages. Six months of pages makes progress visible when today's page feels hopeless.
- Let them copy. Copying a favourite comic is a fine way to learn how lines work.
- Keep their style. Manga, cartoons and doodles are drawing too. A child can learn perspective and keep drawing dragons.
Advanced drawing in Dino Kids
Advanced drawing is its own tile in the Art subject of Dino Kids, right after Learn to draw, with the line "Form, light, perspective, poses". It picks up where the six levels of Learn to draw stop, at flat shapes, and carries on in the order this article has described.
- 32 lessons in 4 levels, Level 7 to Level 10, eight lessons each.
- 32 concepts, one per lesson, from "Solids have depth" to "From composition to finish".
- 250 drawing steps in all.
- A Let's try! game in every lesson. Your child moves something with their own hand: drags the lamp around a box and watches the bright side change, slides the vanishing point along the horizon, turns a gift box until one vanishing point splits into two, raises and lowers their eye level, slides a head ruler down a figure.
Nothing is locked, and every child profile can see it. A card at the top of the list says: "This part is for big kids. Want to try? Go ahead and draw!"
One lesson, beat by beat: Railway track (Level 9)
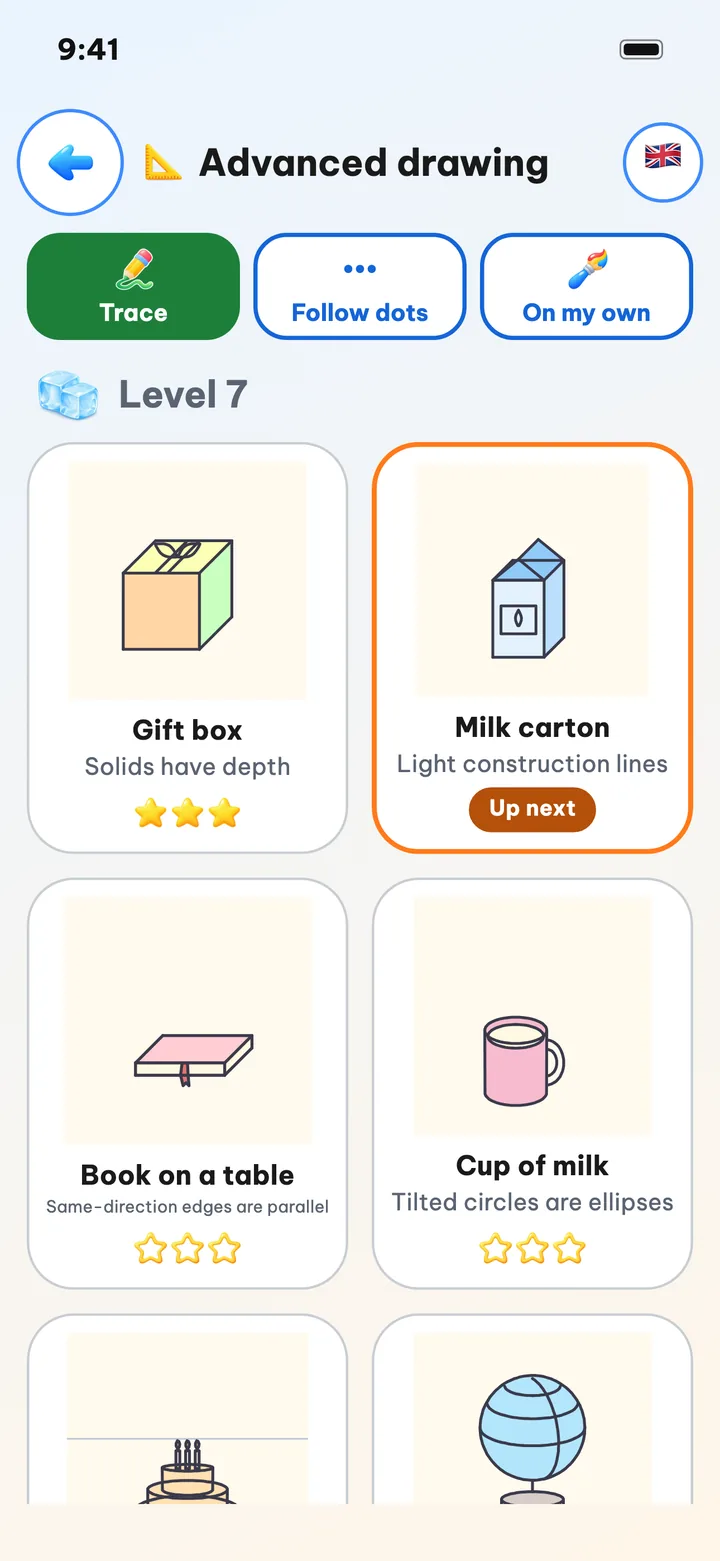
Here's how a single lesson runs, using Railway track, whose concept is Vanishing point.
- Let's try! "Slide the vanishing point along the horizon and watch the track follow!" Your child drags the point left and right and sees both rails swing to meet it, before anyone has explained a thing.
- Did you know? As soon as the game ends, with the track still on screen, the app reads: "The two rails are parallel, but far away they meet at one point on the horizon. That point is called the vanishing point." A small diagram drawn by the app, with labels, sits beside the sentence.
- Drawing, step by step. Seven steps, each shown on screen and read aloud: Draw the horizon; Dot the vanishing point on the horizon; Draw two rails from the bottom edge to the vanishing point; Draw flat ties across the rails, closer together further away; Draw the train far away, near the vanishing point; Go over the main lines with a dark line; Gently erase the light lines. The paper looks like a sketchbook page, and the tools are a Light pencil, a Medium pencil and a Dark pencil, the same light-then-dark way an art class works. A button switches between Show guide lines and Hide guide lines, so your child can check the construction or see the clean drawing.
- The end screen. Artist's version stands next to Your drawing, with a slider to replay how the artist's version was built step by step. There's no score comparing the two and nothing points out differences. The line reads "Today you learned: Vanishing point", and Save to my art room keeps the drawing in the art room on the device.
Other lessons use the same beats. In Ball on the playground, your child first moves the sun left and right to see where the shadow goes, then hears "The ball blocks the sunlight, so it casts a shadow on the ground, away from the light. The shadow is darkest right where the ball touches the ground." The steps then ask questions as well as lines: "Which side will the shadow fall? Tap that side."
Three kinds of help
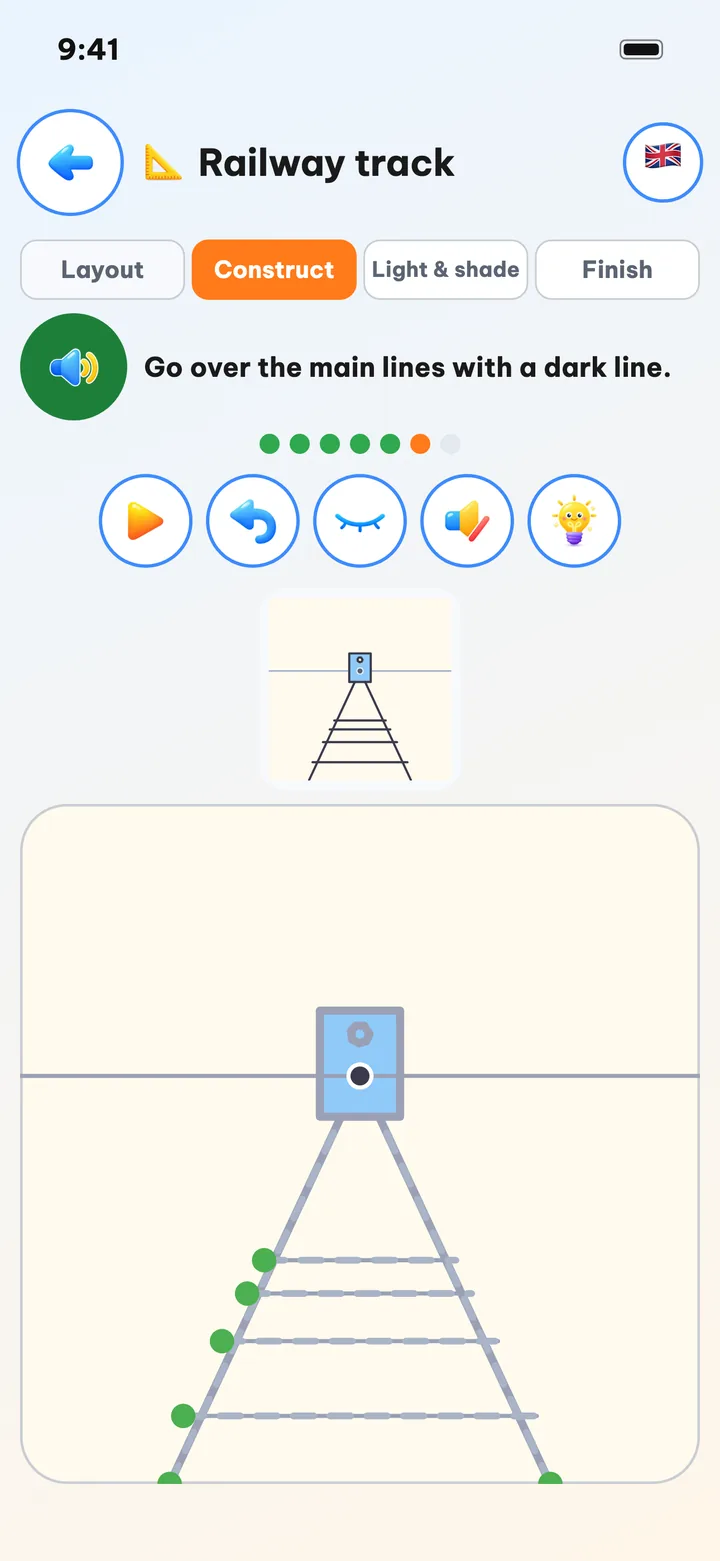
Like Learn to draw, each lesson can be done three ways, remembered separately for each child. Trace shows every dashed construction line, vanishing point and tone area. Follow dots leaves only the landmarks an artist would mark on paper, such as box corners, vanishing points and joints. On my own gives blank paper with a small copy, and checks relationships rather than position: are the edges parallel, do they meet at the vanishing point, is the figure the right number of heads tall. If a step won't come out, the app helps with it, and there are no crosses, no red and no zero stars here either.
The path: four levels, every lesson
The ages are our planning guide only. The app shows "Level 7" to "Level 10" and nothing else.
Level 7: Form (planned for about 10–11). Boxes, cylinders and spheres, built with light construction lines.
- Gift box: Solids have depth
- Milk carton: Light construction lines
- Book on a table: Same-direction edges are parallel
- Cup of milk: Tilted circles are ellipses
- Three-tier cake: Ellipses open with eye level
- Globe: Spheres and wrap lines
- Block house: Solids build things
- Still life on a table: Composition: the big box first
Level 8: Light and shade (about 12 and up). One light source, then tones, then shadows.
- Gift box under a lamp: Light source
- Milk carton in three tones: Three tones: light, middle, dark
- Pencil cup: Form shadow on curves
- Orange: Highlight and reflected light
- Ball on the playground: Cast shadow
- House in the afternoon sun: Low light, long shadows
- Mid-Autumn lantern at night: Contrast makes things stand out
- Still life with shadows: Big light and dark shapes
Level 9: Perspective (about 12–13). Eye level first, then one point, then two.
- Sea and horizon: The horizon is eye level
- Railway track: Vanishing point
- School corridor: One-point perspective
- Library shelves: Above and below eye level
- Street lamps: Same-size things far away
- Gift box from a corner: Two-point perspective
- House on the corner: Diagonals find the middle
- Fire station on the corner: One scene, one eye level
Level 10: Figures and composition (about 14 and up). Gesture, stick figure, solids, proportion, then the whole picture.
- A friend running: Gesture line
- Wooden manikin waving: Stick figure: joints and segments
- Building the manikin: Head, chest, hips: three solids
- The builder: Measuring with the head
- Walking the dog: Kids are fewer heads tall
- Kicking a ball: Balance: a steady pose
- Framing the park: Framing the picture
- Reading by the lamp: From composition to finish
A few lessons show how carefully each idea is set up. In Three-tier cake your child moves their eye level and watches the cake's ellipses open and close. In The builder they slide a head ruler down and count how many heads tall he is, and in Walking the dog they measure Dad and the child to find who is more heads tall. In Kicking a ball they drop a plumb line from the neck to the standing foot.
The last lesson: all four stages
The final lesson, Reading by the lamp, pulls the whole course together. Its game asks, "Tap the artist's four steps in the right order!", and the lesson explains: "Artists draw in four steps: composition, construction, light and dark areas, finishing. In this drawing you do all four." A bar across the top marks each stage as your child reaches it: Layout, Construct, Light & shade, Finish. Along the way they fit a box around the group, draw the gesture line, build the figure from a stick figure and blocks, check proportion with the head ruler, shade every dark part in one go, and finally erase a bright spot and the light lines.
What the lessons don't cover
We'd rather be clear about the edges. There's no colour: everything is pencil, light to dark. There's no anatomy and no detailed portraits, and perspective stops at two vanishing points, with no three-point perspective. The figures are clothed people or wooden manikins. On a small phone the app warns, "This screen is small, so the paper is tiny. Try a bigger screen."
A tablet won't give your child the feel of graphite on paper, so the lessons work best next to a real sketchbook: learn the idea in the app, then try it on the shoebox under the desk lamp. The drawing page shows both sets of lessons.
Good to know
- The Advanced drawing lessons come with the app. The read-aloud voice is downloaded from our server, so the first time needs a connection.
- Dino Kids is free: no ads, no in-app purchases, no account needed. It's something Digi Dinos makes for the community, not a revenue channel.
- If you don't see Advanced drawing, update the app to the latest version. If you teach art and have thoughts on the lesson order, write to us at dinokids@digidinos.com.
References
- Cohen, D. J., and Bennett, S. (1997). Why can't most people draw what they see? Journal of Experimental Psychology: Human Perception and Performance, 23(3), 609–621.
- Davis, J. H. (1997). Drawing's demise: U-shaped development in graphic symbolization. Studies in Art Education, 38(3), 132–157.
- Department for Education (2013). National curriculum in England: art and design programmes of study.
- Department for Education (2015). Art and design: GCSE subject content.
- Lee, M., and Bremner, G. (1987). The representation of depth in children's drawings of a table. The Quarterly Journal of Experimental Psychology Section A, 39(3), 479–496.
- Ontario Art Education Association. Visual arts scope and sequence, Grades 1–8.
- State Education Agency Directors of Arts Education (2014). National Core Arts Standards: Visual Arts at a Glance.
- Toomela, A. (2003). Developmental stages in children's drawings of a cube and a doll. TRAMES, 7(3), 164–182.