 Dino Kids
This is the first article in the "How to use Dino Kids" series. Each one walks through something parents often need to do in the app: setting up a profile for your child, syncing to another device, recording your own voice for lessons, reading stories aloud, adding your own pictures and songs, and setting the rules for playtime. The steps use the exact words you will see on the buttons in the app, and the screenshots were taken on an iPhone. You can also open this series inside the app: Settings → How-to guides, or the  button at the top of the home screen and the welcome screen.
The first job is your child's profile. Pictures, the letters they have written, their stars and their progress in every subject all belong to the profile, so brothers and sisters can share one device without their work getting mixed up.
Creating the first profile
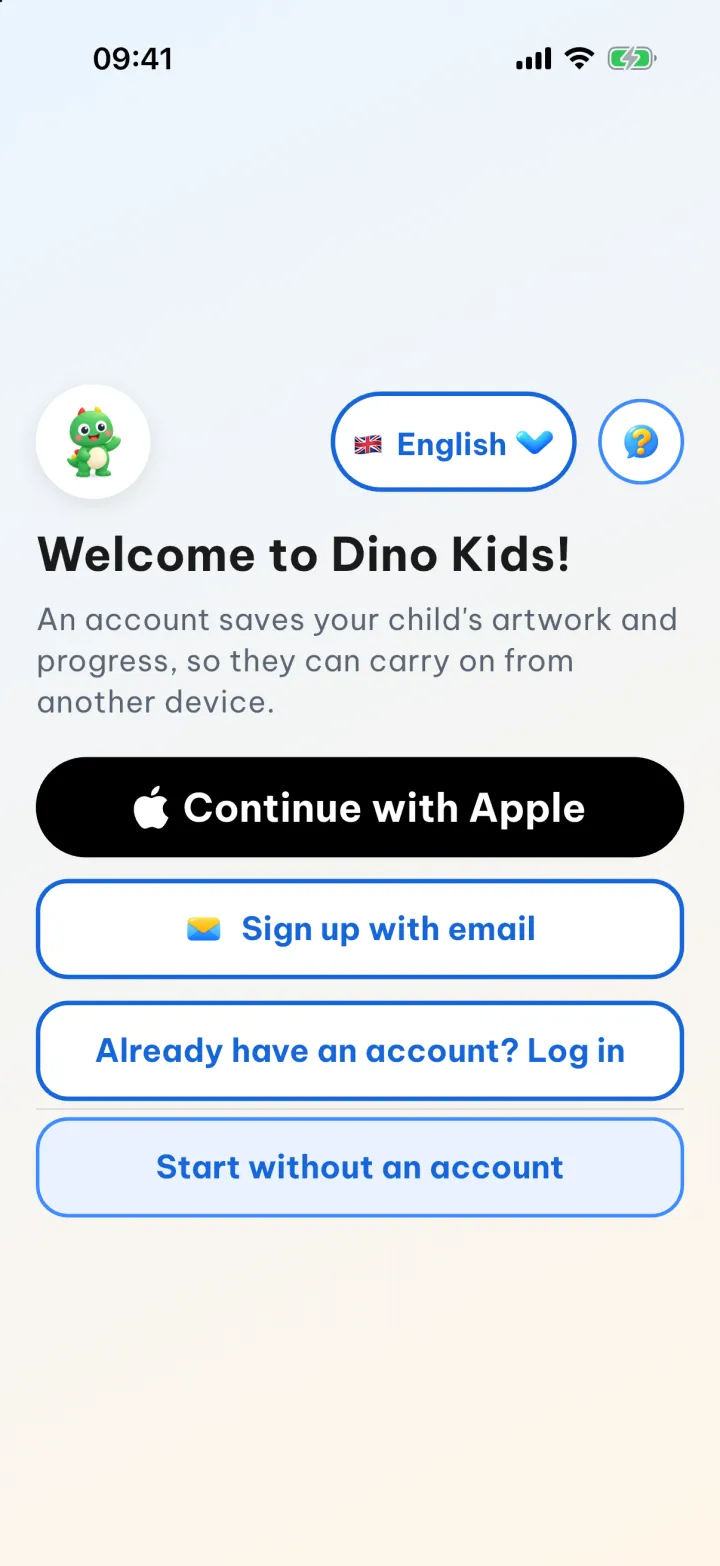
1. Start without an account
On the welcome screen, tap Start without an account. Every lesson works without signing up, and if you create an account later, everything your child has done is kept. If your family already has a Dino Kids account on another device, sign in on this screen instead, so you don't end up with two copies of the same child.
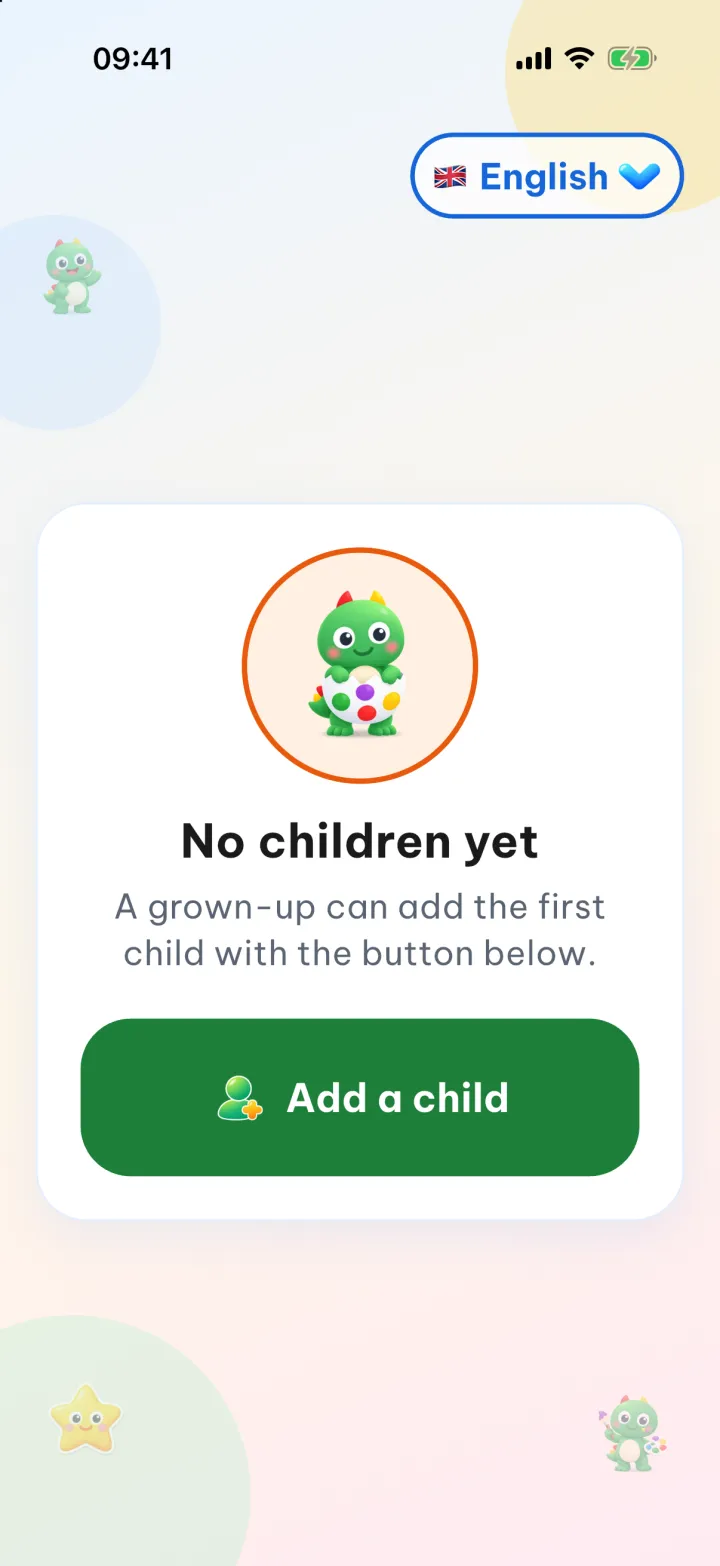
2. Add a child
There are no profiles on the device yet, so the profile screen says No children yet. Tap Add a child. Before the form opens, the app asks a question meant for grown-ups. This is the parental gate: it stops your child from changing their profile or the settings on their own, and you will meet it in every part of the app meant for parents.
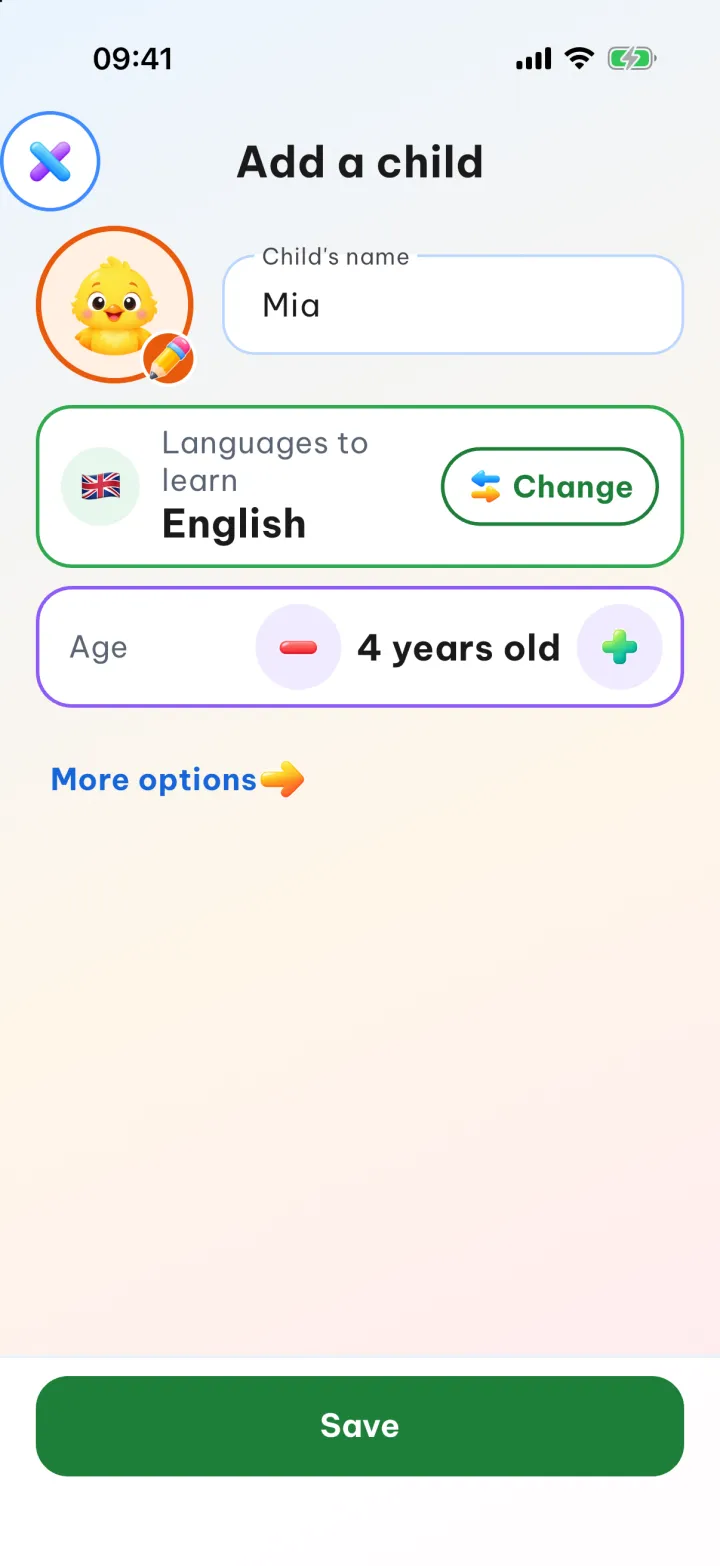
3. Fill in your child's details
A new child starts with the hatching chick picture, age 4, and the language the app is showing already ticked; just change whatever isn't right.
- Child's name: up to 40 characters.
- Picture: the circle with a pencil badge, see step 4.
- Languages to learn: tap the card (its Change button) and a sheet slides up; tick one or more of Vietnamese, Japanese, English, Korean and Chinese, then tap Done!. At least one has to stay ticked. With two or more, the card shows a globe, their flags and how many there are, such as 🇯🇵 🇬🇧 · 2 languages. The Learn languages tile on your child's home screen only shows the languages you tick. Unticking a language simply hides it, and ticking it again brings it back.
- Age: for children under 5, handwriting lessons use bigger tracing strokes and are marked more gently. Age is also what the By age play ticket rule goes by.
- More options: opens Daily goal, from 5 to 60 minutes.
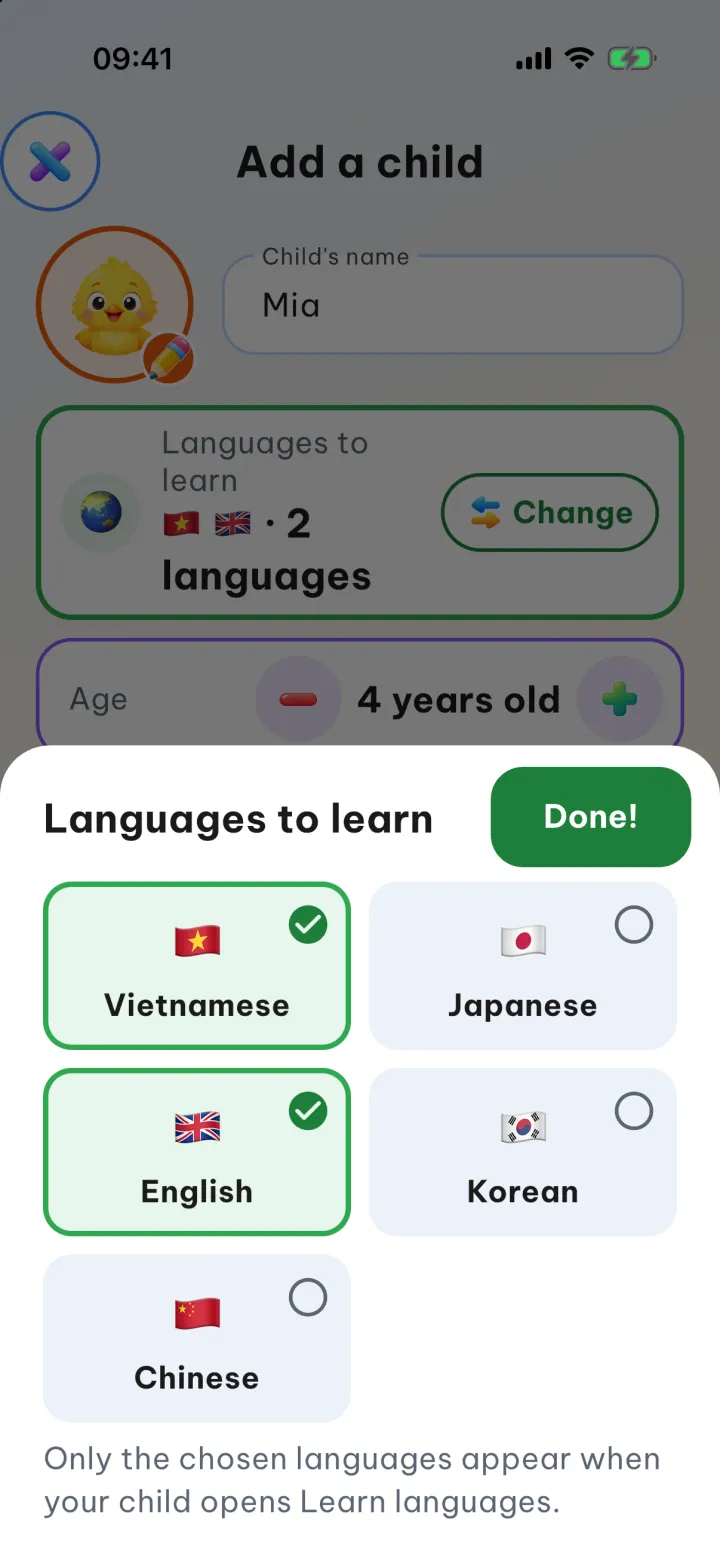
4. Choose a picture, then save
Tap the picture (the circle with a pencil badge): a grid of animal pictures opens right inside the form, and tapping one picks it. To use a real photo, tap the first tile,  , and the Avatar sheet offers three options: Take a photo, Choose a photo and Use an animal. A child who can't read yet finds their own profile by this picture. A real photo is cropped to a square, has its location data removed and stays on this device only; it is never sent to your account. Other devices in the family show the animal instead.
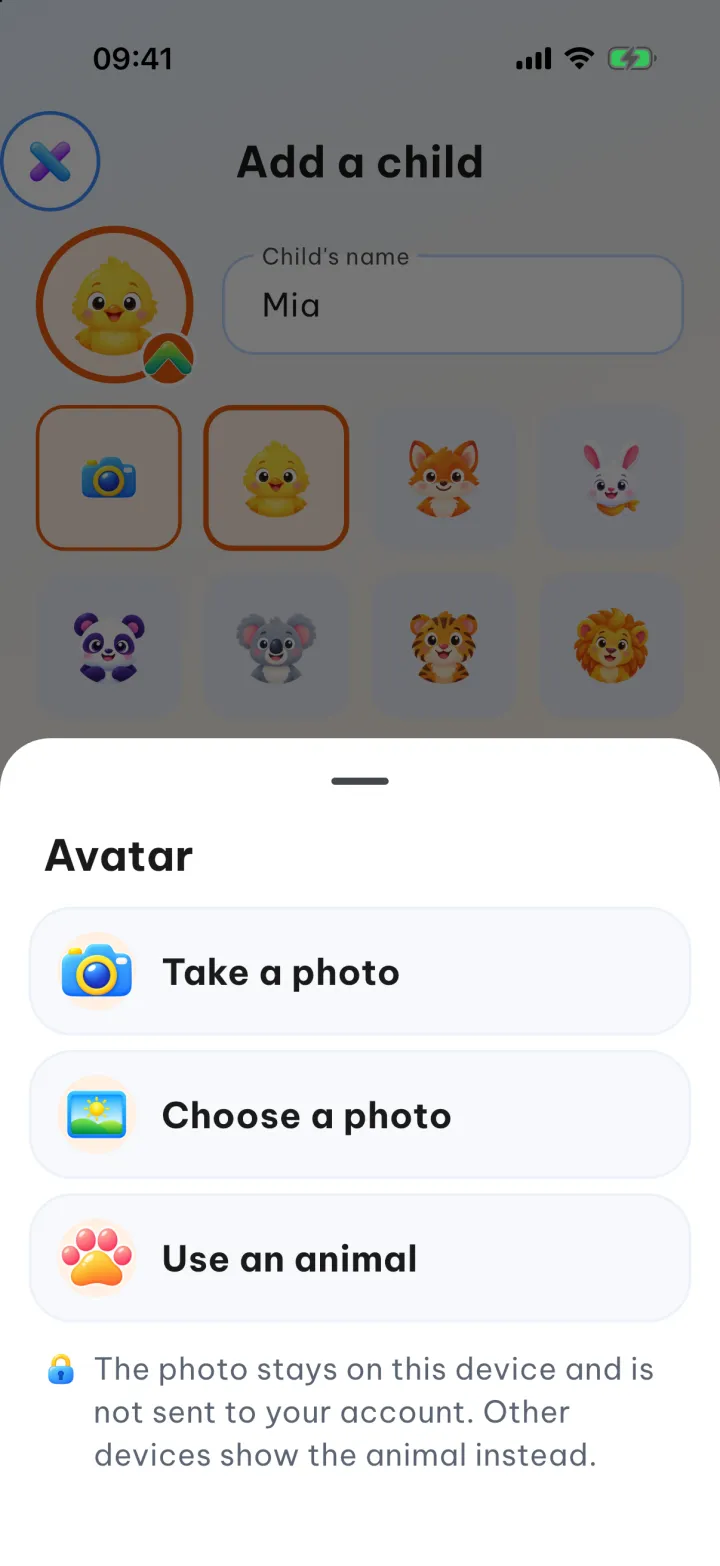 tile opens three options; a real photo stays on this device
Once you have chosen a picture, check the details and tap Save; the app goes straight to the new child's home screen. If you tap  before saving, the app asks Not saved yet: tap Save to keep your changes or Don't save to drop them.
Adding brothers and sisters
For a second child and beyond, go this way: on the home screen tap  in the top right corner, pass the parental gate to open Settings, scroll to the bottom and choose Family account. On the Account screen, tap the Your children row, then + Add a child. There is no limit on the number of children. Each child's card in the list has a
 button, Edit child details, for changing their name, picture, age or languages.
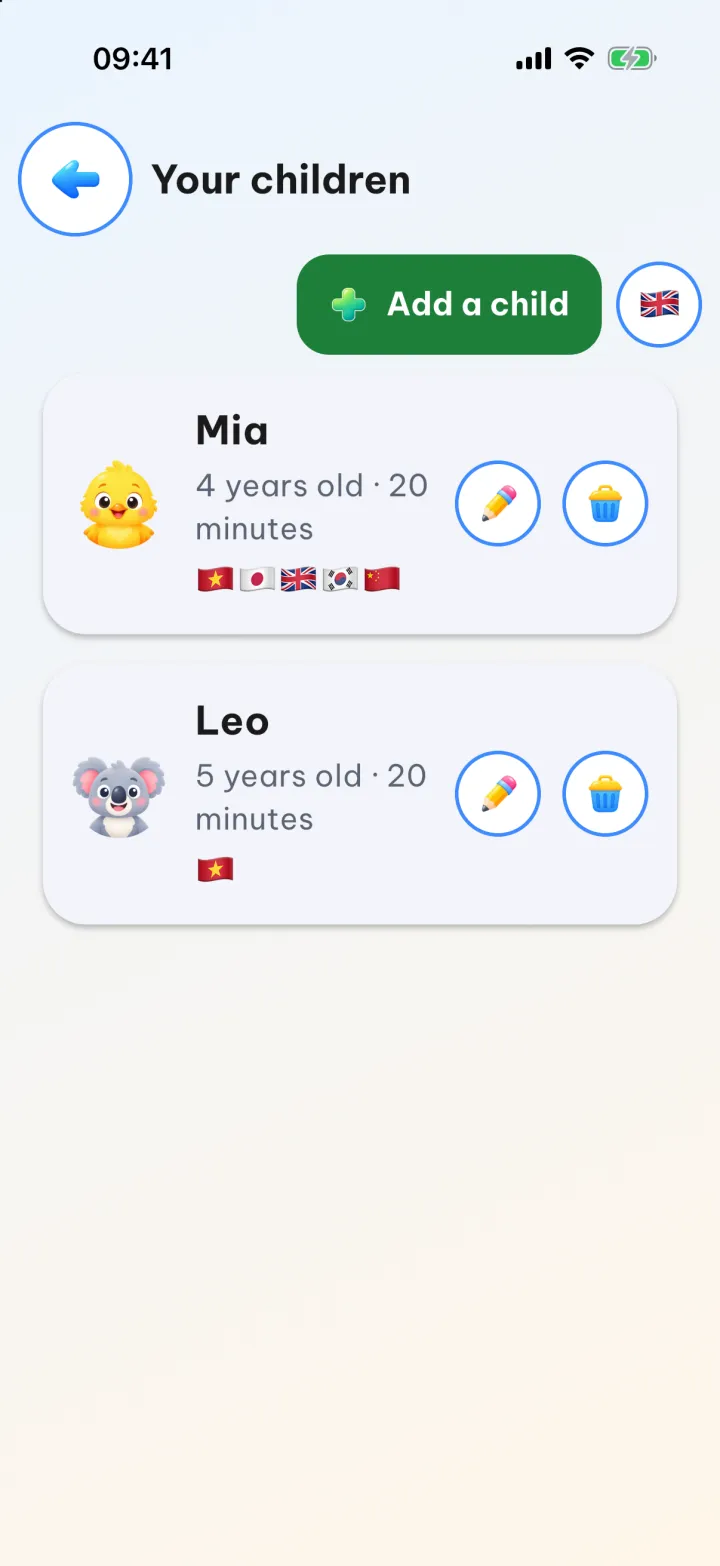 to edit, the bin to remove
Switching who is playing
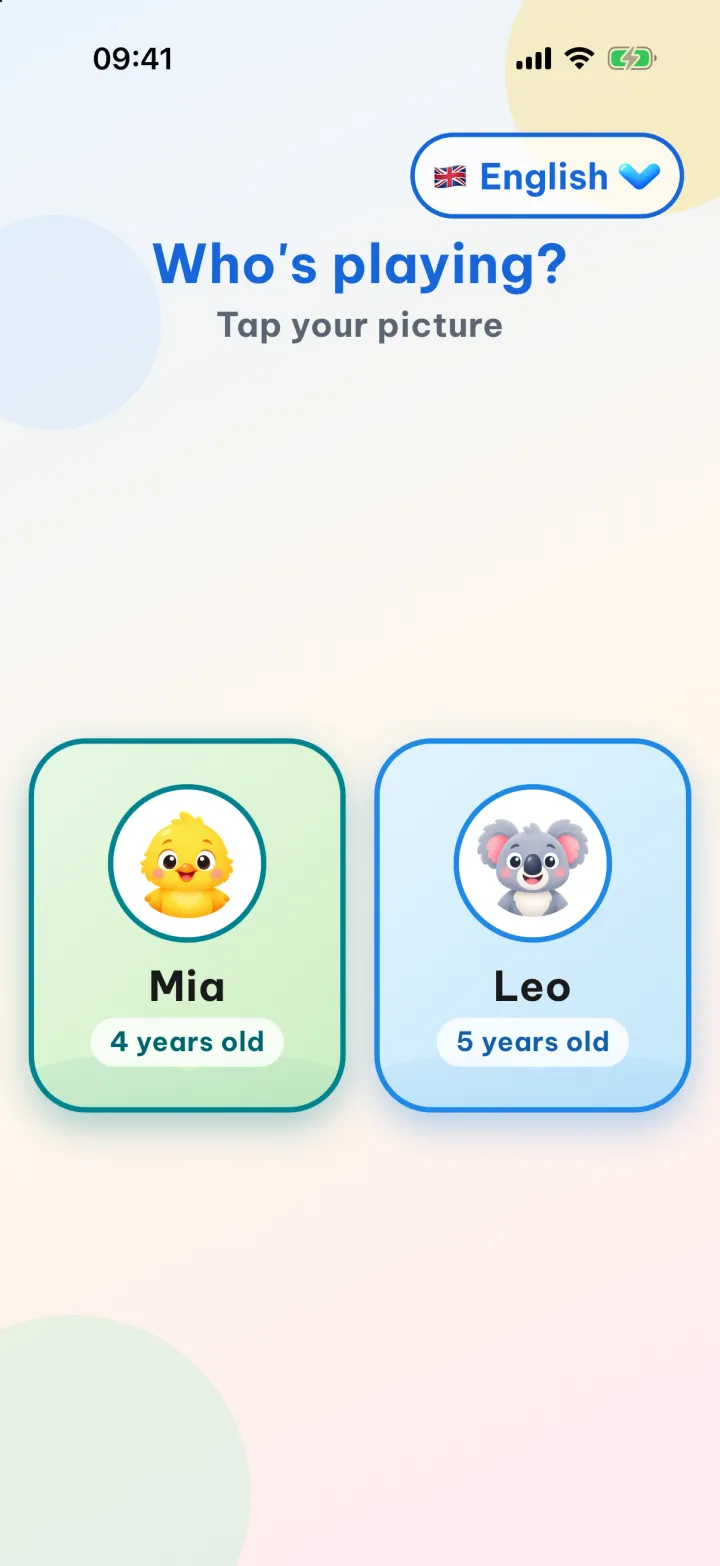
On the home screen, tap the big round  button in the top right corner (it comes before the and buttons). The Who's playing? screen shows each child's picture, and your child taps their own to go in. This step doesn't go through the parental gate, so children can switch by themselves.
Removing a profile
In Your children, tap the bin on the child's card. The app asks you to confirm and tells you how many pictures will be lost with the profile. Removing a child deletes the pictures they have coloured, their handwriting progress, their reports, the colours they mixed themselves and their photo; if you have an account, it is deleted from the server as well. This cannot be undone. Your own voice recordings for lessons and stories are kept, because they belong to the whole family.
Good to know
- If you want your child to be able to open lessons they haven't reached yet, turn on Unlock every lesson in Settings. Each child has their own switch, and it only applies on that device.
- Without an account, profiles live on this device only. With an account, your child's name, age, languages and daily goal follow them to your other devices; a real photo does not.
- Button labels and praise follow the app's language on this device, the same for every child. Change it in Settings → Language → Change, or with the language button (a flag and the language's name) at the top right of the welcome screen and the Who's playing? screen. Most other screens also have a round flag button at the right end of the title bar.
If a step in this series isn't clear, or the app behaves differently from what we describe, please write to us at dinokids@digidinos.com.